 There's nothing special about this shirt except a few yellowish stains that make it impossible to wear, even if it were something you'd be interested in wearing in the first place.
Never fear! I have the perfect idea to turn this dead weight into something that will be an asset to my wardrobe!
You see, where I work, sleeveless shirts are against the dress code. But where I work is also a 10-minute walk from home, meaning, in the height of a sticky DC summer, I want to dress cool and comfortable for my travels.
The solution is to wear a tank top and throw a light short-sleeved shrug over it when I'm at work! This shirt will make the perfect top layer, since white goes with everything!
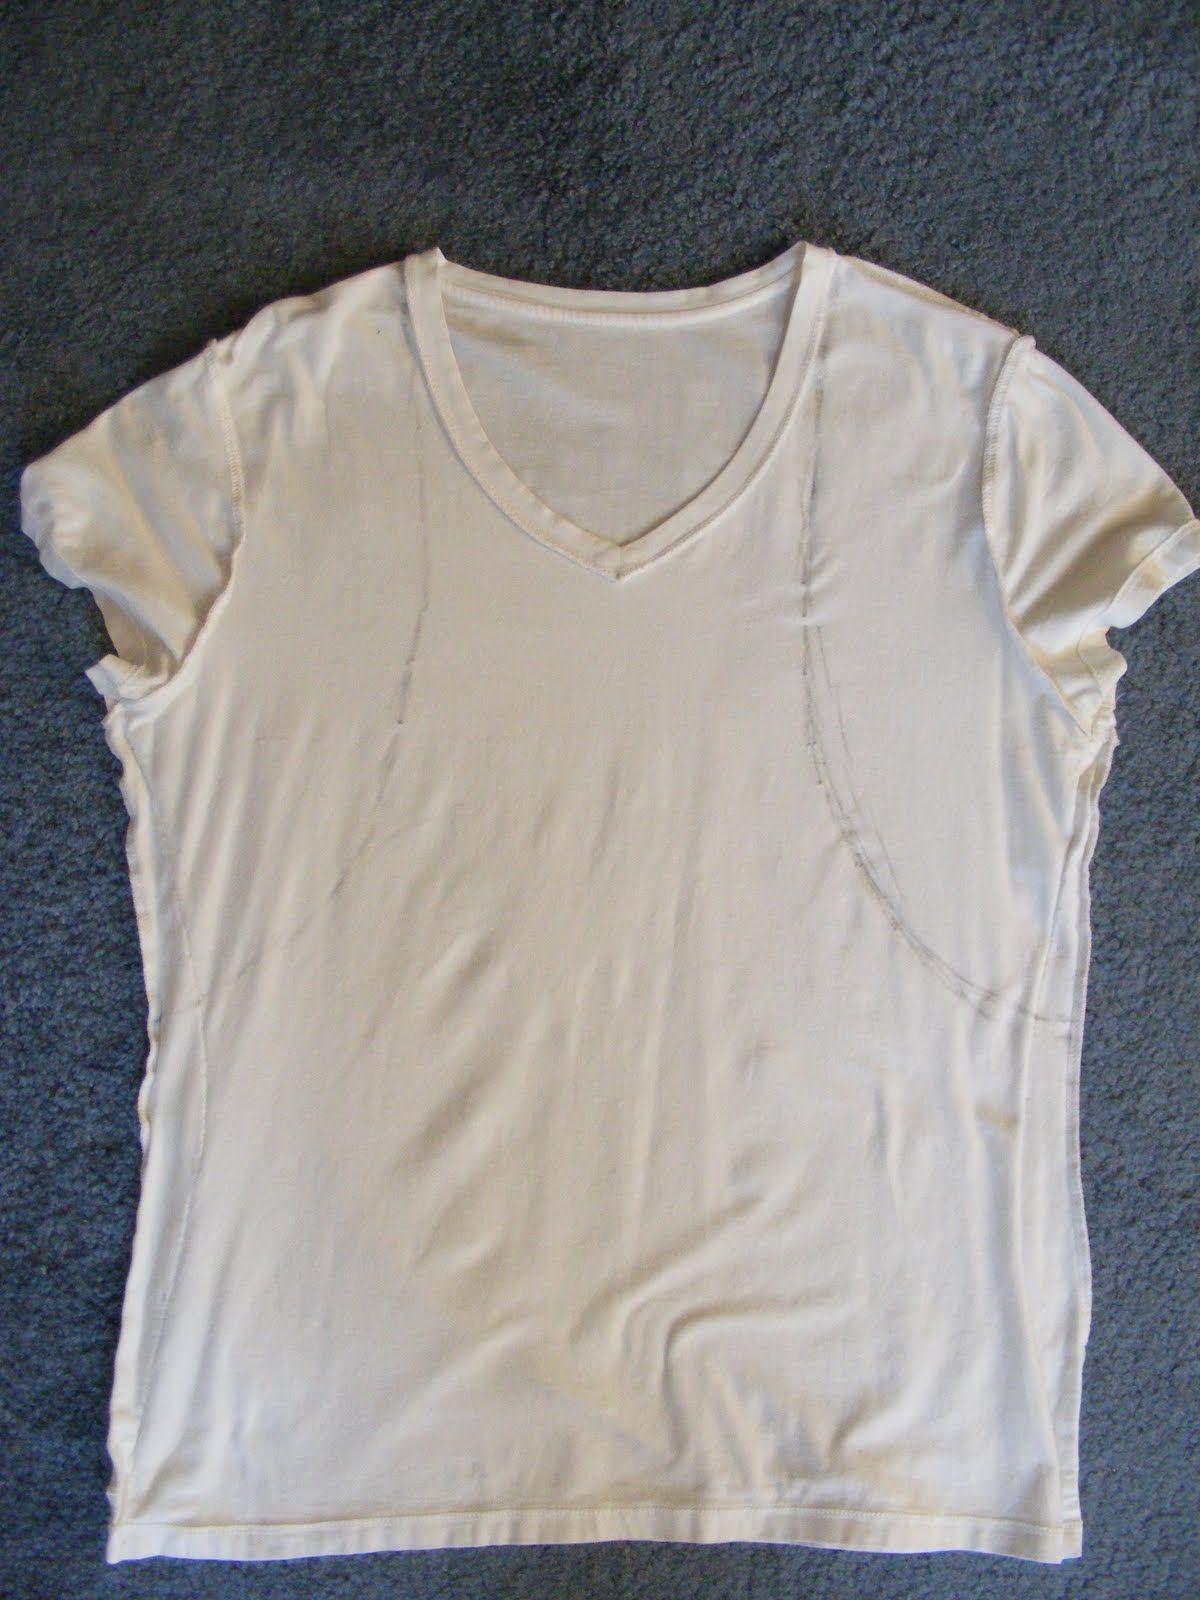 1. Turn the shirt inside out and mark the approximate shape of the finished piece. I want to make sure I remove the entire original collar, so that's not going to leave us much fabric to work with. A shrug this skimpy is more properly called a "bolero," but that term doesn't seem to be popular at present.
 On this particular shirt, I had previously modified the original side seams to accommodate my unusually slender shape (OK, it's really because I'm forever buying XL shirts when I should wear an M). I'm not sure whether I want to keep this alteration or take out the seams for a looser fit. Stay tuned. Although you probably will not have to deal with this conundrum unless you're already a hardcore Unfashionista yourself.
 2. Now comes the point of no return—where we actually begin cutting the fabric! Cut a generous approximation of the bottom hem. If it's too long, you can shorten it later.
 3. Lop off the original collar.

 Here's how it looks so far! This is pretty much the finished product, except that the back is much longer than the front! Obviously we'll have to shorten that up!
 I think I'm going to keep my added seam. It looks fine the way it is, and this'll save me having to rip the seam out.This means I'll have to cut along it to get rid of excess fabric and ensure that the front transitions smoothly to the back.
 Here's the shirt lying flat. After we cut off the bottom edge of the back side, we'll be done! 4. Chop chop!
While my previous post on T-shirt surgery shows you can make an acceptable article of clothing with a raw edge, this shrug is curling into itself something fierce, and I think it needs a little more refinement.
The next post will show you how to add pretty trim to your creation.
No comments:
Post a Comment