
Ever since I first saw them at Rugged Wearhouse, I've had a thing for hard-sided metal-clasped wallets. I am not sure why, but I just really, really wanted one.
Of course, I never pay more than 2 dollars for a wallet (unless it can double as a purse/cell-phone case), so it was a long time (years) before I found one in my price range. The one I got was in such bad shape, I questioned whether it was even worth the dollar I paid for it, but ultimately I decided that the hardware alone was worth the price, and I would craft the ugly thing into something gorgeous!
Originally, I had the idea to decoupage it with cute pictures of cats or some sort of animal. But, the thing is, that would require me to actually find and print said pictures, and I really wanted this to be a 100% scavenged project. Since, after several weeks, cute pictures of animals never found their way into my lap, I decided to go with a material I already had—decorative tissue paper (the same paper, you might recall, that I made into earrings a few posts ago).
It didn't take long before I'd given the scuffed and battered wallet new life with a pretty and bohemian makeover! If you want to do the same, here's how!
You'll need:
- A boxy wallet without any embellishments or weird edges.
- Tissue paper
- White glue
- Spray adhesive
- Varnish
- X-acto or craft knife

This first step is probably optional, but I started by peeling off the damaged exterior layer of the wallet to reveal a less shiny, more adhesive-friendly texture underneath. If it's easy to do, I recommend you doing it, too, but don't sweat it if your wallet does not peel.
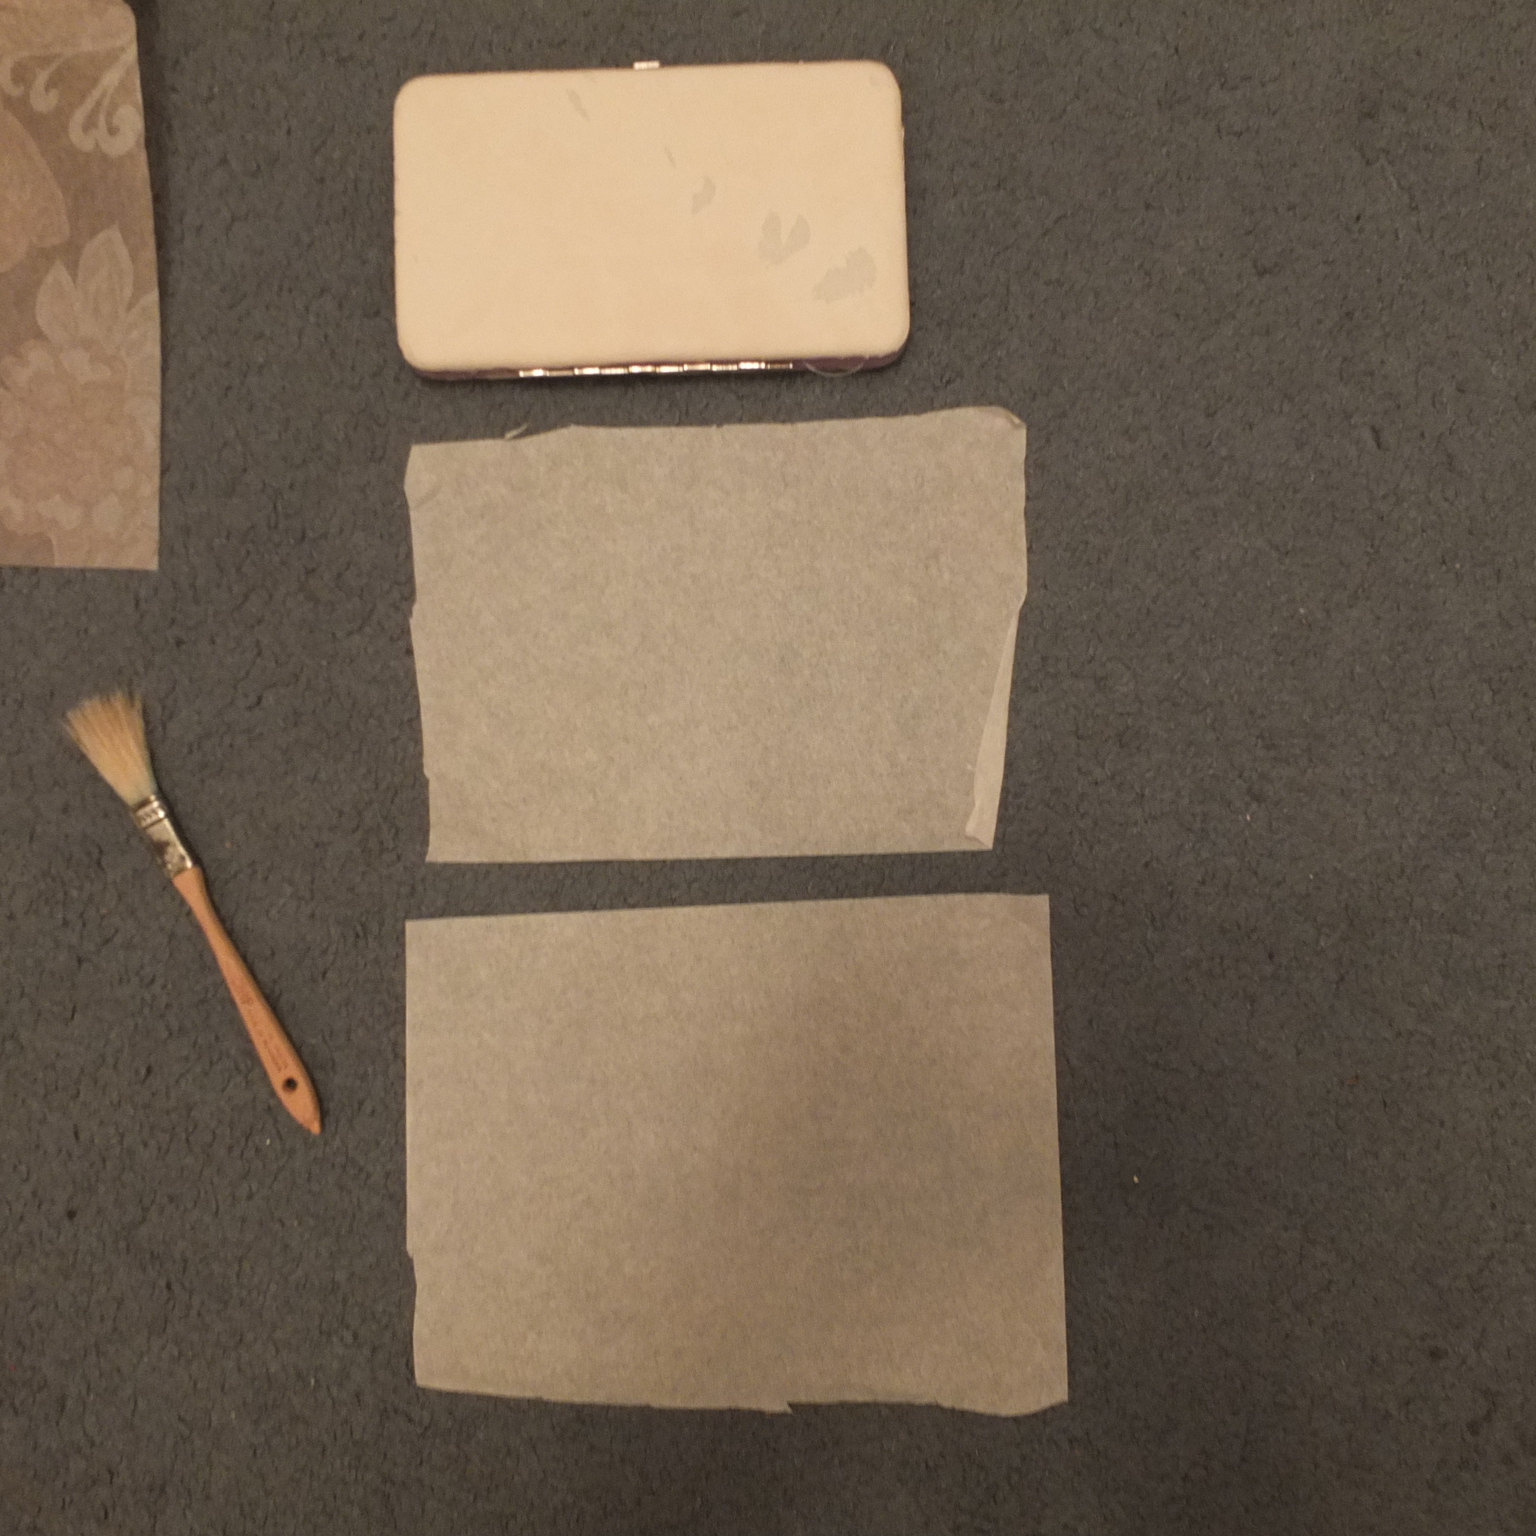
Cut out 2 rectangles of paper just a little bigger than the size of the wallet. This first layer of paper is just to smooth out any imperfections in the texture and reinforce the paper so it's less fragile. If your outer layer of paper has a pattern, this first layer should be a solid color so it doesn't interfere with the design.
 Spray the one side of the wallet with spray adhesive (You could probably use white glue for this step as well, but the spray adhesive makes it a lot quicker and easier). I did it inside a cardboard box to keep the spray from going everywhere.
Lay the wallet on the paper and fold the edges over so they wrap around the wallet. No need to be too precise here, this is just a rough first stage.

Mix white glue with a little water to create a liquid consistency.

Brush the watery glue over the edges of the paper, folding them down more neatly over the edges of the wallet.

These layers should not quite reach the edge of the wallet, so trim them with your X-acto knife as needed. It's easy to cut the excess or even just rip it (carefully) once it is wet! You should probably aim for more coverage than you see in the picture, but again, don't sweat it if, like me, you underestimated how much paper to use.
Follow the same steps on the other side.
Once the edges are down, paint a thin layer of watery glue over whole wallet. This will help flatten out air bubbles and add a little strength to the paper.

When the first layer is dry, repeat the above with your second (patterned) layer of paper! Cut 2 more rectangles of paper, spray them and lay them as before.

Paint the edges with watery glue.
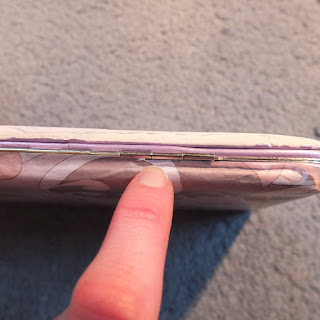 This time, when the paper is thoroughly soaked with glue, trim any excessively long edges and then press them down into the cracks around the metal frame to create a more polished-looking edge.

Again, paint a layer of glue over the whole wallet and wait until dry.

Seal the finished product by painting it with two thin layers of varnish. This will help keep any raw edges from peeling up, as well as protect the paper from stains and, to some extent, rips and other damage.
All done!

I was concerned that a wallet made out of paper wouldn't last very long, but I've been carrying this one around in my purse for over a month, and it's still holding up! It's gotten a few dents, and the paper is a bit wrinkly (maybe I shouldn't have used so much water in the glue!), but it still looks better than the torn-up shimmery purple thing it started out as!
When and if this wallet finally sustains irreparable exterior damage, I have every intention of doing the whole project again, this time with either a more durable fabric coating, or with my original plan of some kind of graphic decoration!
No comments:
Post a Comment